Air-Layered to Free-Root Transfer in Camellia japonica: From Ringing to Bag Management
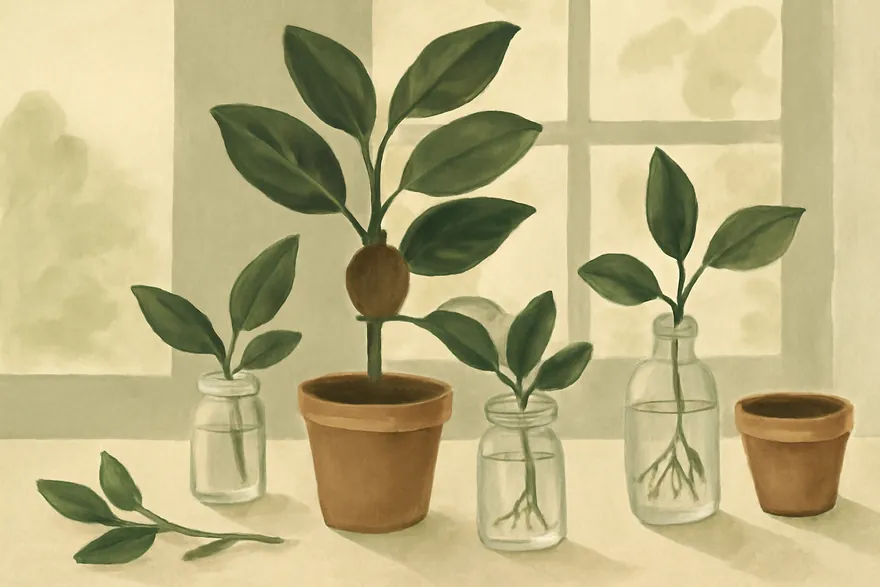
From air layer to real plant: the actual objective
An air layer is a transition state, not a finished plant. In Camellia japonica, the layer survives only while the branch still has access to the donor's roots, hormones, and water status. Once you cut it free, the entire root function depends on your rooting callus and the quality of new vascular reconnection. The goal, therefore, is not just to see white callus, but to deliver a donor-branch segment that can carry water and assimilates without structural weakness. In practical terms, we target three measurable outcomes: (1) high root density close to the former girdle, (2) intact xylem-phloem alignment without torsion, and (3) a root environment that avoids heat stress and oxygen deprivation at the wound margins.
Most failures in this crop are not because camellia is "hard to root" in theory, but because the first root zone becomes a small closed steam bath. A tiny 25-40 mm radius around the girdled spot can swing between 20 C and 40 C in direct sun on black polymer wrapping. At those peaks, cambial cells brown, callus turns brittle, and later roots desiccate even before the layer is severed.
Why camellia layers overheat and why that bends conduits
Camellia japonica has delicate bark with thin cortical tissues; it tolerates short heat spikes better than a true tropical rubbery stem, but not prolonged daily thermal forcing. Two linked problems appear:
- Heat-driven cambial stress. If the girdled zone exceeds roughly 30 C for multiple hours, callus may stay proliferative in appearance but fail to lignify into transport-ready tissue.
- Torsion-induced hydraulic bottlenecks. A layer supported too tightly, or tied too close to the branch base, can twist the axis by less than 20 degrees and still reduce cambial continuity over time. The plant then forms weak callus bridges instead of true root initials.
In practice, you prevent both by coupling thermal control with geometry control: keep the branch in a gentle arc, suspend support below the ring, and force humidity from the outside inward while still allowing gas movement.
Stage 1: donor selection and preparation
When to start
Pick the branch and date first. The strongest layers usually come from semi-lignified shoots formed in the previous growing season, not newly soft tips. Target diameter at the node is generally 8 to 16 mm at the ring zone.
- Choose a healthy branch with active green leaves and no recent pruning stress.
- Use late spring to early summer in your climate, once sap flow is regular but before summer heat settles at the extreme. For most zones, this is often mid-May to mid-June.
- Avoid doing layers directly after heavy rain storms, heavy frost recovery, or immediately after fungicide application.
Sanitation and hormone hygiene
Sterile cuts and low contamination pressure matter more than expensive additives. Use a clean blade, wipe with alcohol, and never dip into a dirty hormone slurry across multiple plants.
- Disinfect blade with 70% isopropyl for 30 seconds.
- Mark the intended ring and inspect for lenticel clusters; avoid visibly damaged tissue.
- If using hormone, a 2000–3000 ppm IBA dip on the cambium ring is a pragmatic range for many camellia layers in practice. Keep contact time short, around 5–10 seconds.
Stage 2: ringing without killing transport lanes
The ring is the center of all success decisions. Your target is to break downward-inhibiting auxin feedback enough to trigger local rooting, but not so much that conduction collapses into necrosis.
- Make a clean circular cut around the stem through bark and cambium only (not deep xylem wood).
- Use a 1.2 to 2.0 cm ring width; this is wide enough to isolate the auxin sink but narrow enough to keep callus viability near both ends.
- Lift the outer bark flap, scrape lightly to remove remaining cambium islands, and keep the exposed wood edge sharp and matte.
- Immediately wrap any exposed root candidate zone with root substrate before heat builds up.
Do not exceed this width on first attempts. Wider rings look decisive but often produce constriction zones and weakly connected roots, especially on compact cultivars.
Stage 3: root substrate and bag architecture
Root medium that breathes
The rooting zone is not merely “wet moss”. Camellia does better when medium is moist and oxygenated, with stable acidity and no coarse salts.
- Base blend: sphagnum peat + perlite + pine bark at roughly 2:1:1.
- Pre-moisten to about 85–90% water-holding point; press it by hand and release one small drop, never a stream.
- Optional amendment: small amount of activated charcoal dusted around but not embedded, helping odor control and reducing sticky biofilm in humid bags.
Bag architecture for camellia
The wrapper design should target low heat, moderated humidity, and enough gas exchange.
- Use a two-layer approach: inner moisture-retentive wrap, outer reflective or off-white thermal shield.
- Inside: thin nonwoven or permeable film to hold medium shape.
- Outside: reflective layer that is not directly black under midday sun. If only dark film is available, orient with shading and micro-vents instead.
- Puncture 2 small vents on opposite sides before installation; add 2-4 more if day highs exceed 28 C for more than 3 days.
Target root-zone temperature to stay below 30 C and ideally in the 22–28 C band through the heat peak.
Stage 4: execution flow from ringing to active callus
- Excavate a 4–6 cm diameter pocket around the girdled zone with your substrate mix.
- Pack carefully around all cambium edges, avoiding compression that starves air spaces.
- Position a moist wick string at the top edge of the pocket so evaporation remains balanced.
- Close wrap from the top, then sides, then anchor with soft ties every 3–4 cm so the wrap does not twist.
- Tie branch to a separate support stake, leaving a natural gentle curve. This removes leverage that can bend conducting tissue over time.
- Label with date, cultivar, ring width, hormone concentration, and branch diameter for later comparison.
For the first seven days after wrapping, keep moisture stable and avoid frequent unsealing. Micro-open for inspection only if medium is visibly collapsing or heat smell appears (acidic ferment smell indicates anaerobic micro-pockets).
Stage 5: bag management by week and temperature window
The first three weeks are for callus activation, weeks 4–8 are root initiation, and only after week 8 do you chase root thickening.
Weeks 0–2
- Keep RH high, around 90%+ at the pocket surface.
- Protect from direct radiation if daytime ambient temperature exceeds 26 C.
- Do not overwater; if the substrate dries to powder feel, add only enough mist to recover structure.
Weeks 3–6
- If ambient day temperatures are 25–30 C, open one or two vents permanently.
- If ambient below 24 C, keep wrap semi-tight to prevent excessive evaporation.
- Look for callus as creamy to white tissue crossing the split. No root should be forced into visibility yet.
Weeks 6–10
- Expect first visible root initials, often in clusters near the lowest cambium edge.
- At this phase, avoid aggressive watering that raises oxygen depletion.
- Lightly increase gas exchange if condensation remains internal every morning.
Stage 6: when to detach and move to free-root condition
Don’t detach by calendar date alone. Detach by root architecture.
- At least 6–8 visible root initials distributed 360° around the ring zone.
- At least 4 roots longer than 5 cm each, or a visibly consolidated root mantle.
- Substrate core feels resilient, not mushy, and cambium edges at cut zone are light green.
If criteria are met, remove the outer bag, cut the branch below the rooted pocket, and trim only dead or rotten tissue. Keep the top bud set intact unless heavily overloaded.
Transfer to container: no shock phase
- Shift into a container with fast drainage: a coarse base and a moist but airy blend.
- Use a stable pH substrate around 5.0–5.5; avoid dolomitic amendments and saline fertigation.
- Plant so the old ring sits 1–2 cm above the final surface; don’t bury deeply.
- Water deeply once, then keep humidity moderate. First 3–5 days: light shade and no direct sun.
- After day 3, reduce leaf load gently by removing 10–20% of distal foliage in extreme humidity climates.
In the first 10–14 days, the plant is physiologically “re-learning transport.” Root respiration is high, but canopy demand often exceeds supply. A strict light reduction keeps pressure down.
First 8 weeks after free-rooting
- Weeks 1–2: 70–80% light shade, RH around 70–80%, no fertilizer.
- Weeks 3–4: introduce weak feeding if stem color looks pale; use dilute calcium-rich organic feed, low nitrogen.
- Weeks 5–8: move to brighter but still filtered light, reduce watering frequency to maintain top-to-core moisture gradient (a little dry between top layers, never dry at depth).
- Week 8 onward: begin routine container hardening, slightly reducing humidity and raising air movement.
A practical survival target is 80%+ establishment to first bloom cycle if rooting criteria were met and thermal control was maintained before severing.
Troubleshooting based on symptoms
- Brown ring edges: mostly heat or desiccation. Increase ventilation at once and restore even moisture, not flood irrigation.
- Roots circling in one wall: poor airflow or directional moisture. Increase even aeration and re-check branch support to remove torsion.
- Leaf scorch after detachment: too-strong light and high transpiration demand. Immediate shade + temporary leaf reduction saves stem water balance.
- No roots after 10 weeks: likely too cool nights with repeated saturation or too dry pocket. Reassess medium ratio, temperature band, and ring width on the next cycle.
Protocol checkpoints for reproducible results
- Branch diameter and vigor recorded at start.
- Ring width in millimeters (never estimate after the fact).
- Bag temperature relative to ambient at least once daily.
- Vent schedule log and watering intervals.
- Root criteria before detachment, not weeks in the calendar.
This is the difference between “a lucky rooted layer” and a repeatable propagation method. Camellia japonica rewards structure: controlled heat, measured moisture, and a branch path that protects the conductive core. If you treat the air layer as a controlled experiment, one successful branch can become a reliable free-rooted liner line with far fewer collapses and much more honest root architecture.
Air-Layered to Free-Root Transfer in Camellia japonica: From Ringing to Bag Management
| Phase | Observed fact from article |
|---|---|
| Air layer while attached | The layer is still supplied by the donor branch roots, hormones, and water status. |
| After cutting free | Root function depends on new rooting callus and the quality of vascular reconnection. |
| Failure mechanism | Excess heat and poor geometry can weaken cambial continuity and lead to weak callus bridges instead of true root initials. |
Questions and answers
Why do camellia air layers fail and what does the protocol change to prevent it?
Most failures are not from camellia being impossible to root but from a closed, hot root zone and bent conduction pathways. In exposed wraps, the area around the girdle can heat from about 20 C to 40 C and cause cambial stress, while over-tight placement can create torsion, weakening cambial continuity and producing weak callus bridges. The protocol avoids this by pairing thermal control with geometry control: a gentle branch arc, support placed below the ring, and outside-to-inside humidity with gas movement.
How do you know when an air layer is ready to be detached to free-root condition?
Do not detach by date alone. Cut the branch when root architecture is clearly ready: at least 6 to 8 visible root initials around the ring, and at least 4 roots longer than 5 cm or a visibly consolidated root mantle. The substrate core should feel resilient rather than mushy, and cambium edges at the cut zone should be light green, indicating viable reconnection before transfer into fast-draining container media.